Jump to navigation

  •  
  •  
  •  

  • Courses
  • Resources
  • Case study
  • Showcase
  • Tools
  • Gallery
  • Videos

Search form

Animation Design Communication Design Design Fundamentals Interaction Design Product Design Tools for Design Open Design
Home / Resources / Jute Handicrafts - Kolkata / Making Process

.

top unblocked 76 games free access unblocked games 76 now latest unblocked online games kays games unblocked access retro bowl unlimited play play retro bowl without block cool math brain games free school-friendly unblocked games yohoho io game online lesson guru hack and help play baseball bros unblocked classroom 6x games to play 76
Design Resource

Jute Handicrafts - Kolkata

Utility Items
by
Prof. Bibhudutta Baraland Srikanth B
NID, Bengaluru
Making Process
 
  • Printer-friendly version

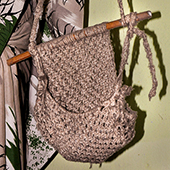
The artisan starts the jute bag-making process with the cutting of jute yarn into required sizes, all in equal length. Individual yarn cuts from this are then mounted on a wooden handle using a lark's head knot. After the knot is tied around the handle sides as well, the yarn cuts are wrapped together at the down end at both sides. Here two types of lark’s head knots are used; Reverse knot and Square knot. In reverse larks head knot, the jute yarn is folded in half and placed under the pair of handles from top to bottom. Now reaching under the loop and over the handle, the two loose jute yarns are brought down through the loop and pulled to tighten the knot. After mounting these jute yarns, the artisan proceeds to square knots to complete the work. For square knots, four yarn cuts are taken. Now placing the left end yarn over the middle two strands and under the right end, the artisan takes the right yarn and tucks it under the middle two. Use the same technique to tuck the far-right yarn through the loop created by the left-end yarn. Now pulling the outer yarn, the knot is secured. This step is repeated with four more yarns. It is essential to connect the yarns by taking its four centerpieces and tying another square knot. Here the second knot has to be started from the right end.  This alternating method has to be practiced until the required size is achieved. Once the intended size is reached, the ends are secured for having the final look of a jute bag.
col-sm-4
col-sm-4
col-sm-4
col-sm-4
col-sm-4
col-sm-4
col-sm-4
col-sm-4
col-sm-4
col-sm-6
col-sm-6

‹ › ×


    • Introduction
    • Tools and Raw Materials
    • Making Process
    • Products
    • Video
    • Downloads
    • Contact Details
    • Credits

    Creating Digital-learning Environment for Design


    • Courses
    • Resources
    • Case study
    • Showcase
    • Tools
    • Gallery
    • Videos
    • Animation Design
    • Communication Design
    • Design Fundamentals
    • Interaction Design
    • Product Design
    • Tools for Design
    • Open Design
    • Contribute to our Dsource
    • About
    • People
    • Events
    • Job@D'source
    • Contact Us
    • Privacy Policy
    • Download App
    • YouTube
    • Facebook
    • Twitter

    Indian Language
    English Bangali Gujarati Hindi
    Kannada Malayalam Marathi Punjabi
    Sindhi Tamil Telugu Urdu