Jump to navigation

  •  
  •  
  •  

  • Courses
  • Resources
  • Case study
  • Showcase
  • Tools
  • Gallery
  • Videos

Search form

Animation Design Communication Design Design Fundamentals Interaction Design Product Design Tools for Design Open Design
Home / Resources / Dolls of Jhabua / Process

.

top unblocked 76 games free access unblocked games 76 now latest unblocked online games kays games unblocked access retro bowl unlimited play play retro bowl without block cool math brain games free school-friendly unblocked games yohoho io game online lesson guru hack and help play baseball bros unblocked classroom 6x games to play 76
Design Resource

Dolls of Jhabua

The Craft of Doll Making
by
Sakshi Gambhir
IDC, IIT Bombay
Process
 
  • Printer-friendly version

The process of making a doll is quite uncomplicated. Also, work is carried out efficiently by doing one task at the time. The basic raw material required is fabric (for making body parts and clothes), cotton (to stuff), metal wires (to make the skeleton of the legs) and clay (to make the face).All of these are locally available.

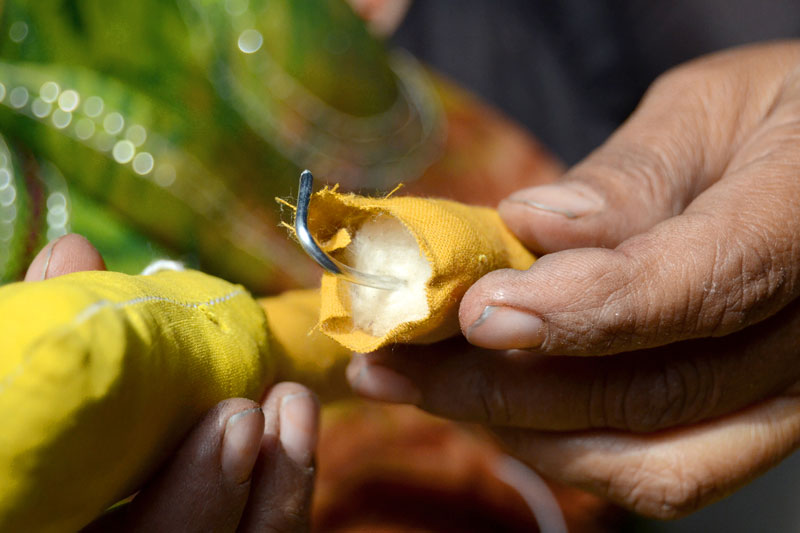
The first task is to draw legs, arms and torso of the doll on a piece of fabric. Then two layers of it are stitched together along the drawn lines to form the body parts. These are turned inside-out and cotton is filled into them till they are fully packed. Metal wires are used only in the legs for the doll to stand firmly on a wooden base. Once all the parts are ready, they are joined with a strong cotton thread. ‘Pakkataanka’ or double knots are made for the stitching to be long lasting. Then the stuffed body parts are made to wear clothes that are stitched well to their fitting. The face is made with clay and all the features are carved out in great detail. These are fired with locally available cowdung or ‘upla’ and then covered with a thin layer of cloth. Mr. Parmar, who undoubtedly has a very steady hand with the brush, paints facial expressions on this. Once the doll is all set to stand, the metal wire popping out from the lower end of the leg is put onto a wooden base. It is twisted and hammered from the back.

col-sm-3
col-sm-3
col-sm-3
col-sm-3
col-sm-3
col-sm-3
col-sm-3
col-sm-3
col-sm-3
col-sm-3
col-sm-3
col-sm-3
col-sm-3
col-sm-3
col-sm-3
col-sm-3
col-sm-3
col-sm-3
col-sm-3
col-sm-3
col-sm-3
col-sm-3
col-sm-3
col-sm-3
col-sm-3
col-sm-3
col-sm-3
col-sm-3

‹ › ×


    • Introduction
    • Place
    • People
    • Process
    • Products
    • Downloads
    • Contact Details
    • Credits

    Creating Digital-learning Environment for Design


    • Courses
    • Resources
    • Case study
    • Showcase
    • Tools
    • Gallery
    • Videos
    • Animation Design
    • Communication Design
    • Design Fundamentals
    • Interaction Design
    • Product Design
    • Tools for Design
    • Open Design
    • Contribute to our Dsource
    • About
    • People
    • Events
    • Job@D'source
    • Contact Us
    • Privacy Policy
    • Download App
    • YouTube
    • Facebook
    • Twitter

    Indian Language
    English Bangali Gujarati Hindi
    Kannada Malayalam Marathi Punjabi
    Sindhi Tamil Telugu Urdu